How to Record Screen:
Maybe you are trying to make it easier when showing someone how to do something or maybe you need to record some strange behavior if an app isn't working as you expect. Luckily, with VAIS Screen Capture, it's easy to record everything happening on the screen of your PC. It not only can capture webcam video and online streaming video, but also can record audio synchronously, which means that you can create demonstration videos on the fly without having to record the sound in the editing process. No matter how long the video will last, its maximum recording ability will suit all individualized needs. Meanwhile, the scheduled recording can free yourself from waiting in front of the computer. Moreover, a set of post-recording options comes in handy to enable you to apply overlay image and filter effects to the recording.
1. Choose Recording Region
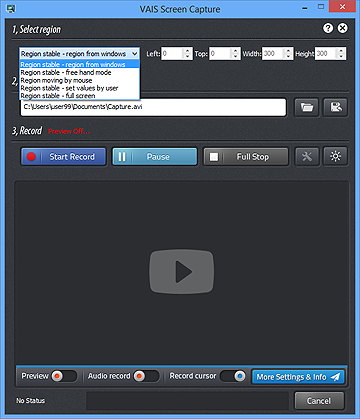
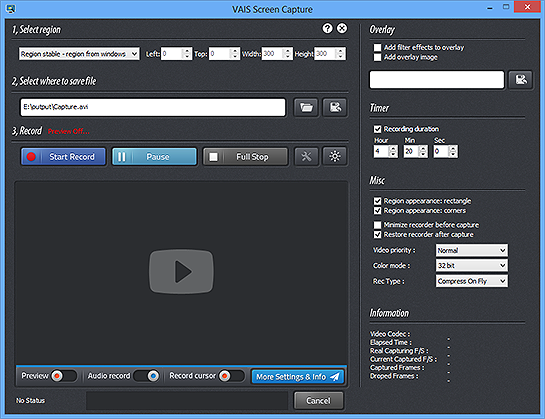
First, you need to download VAIS Screen Capture and launch it. In the dropdown menu of "Select region" you can see 5 options for region selection: Region stable - region from windows, Region stable - free hand mode, Region moving by mouse, Region stable - set values by user and Region stable - full screen. In this tutorial, we choose the "Region stable - region from windows".
2. Select Output Folder
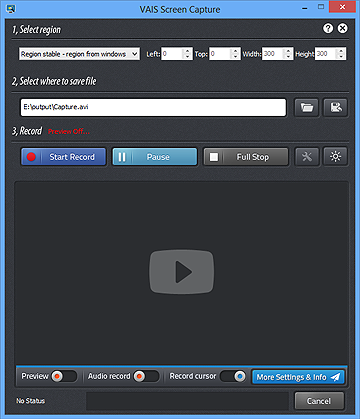
In "Select where to save file" area, you can choose an output folder for your recordings by clicking "Open Folder" or "Select...".
3. Advanced Settings for Recording
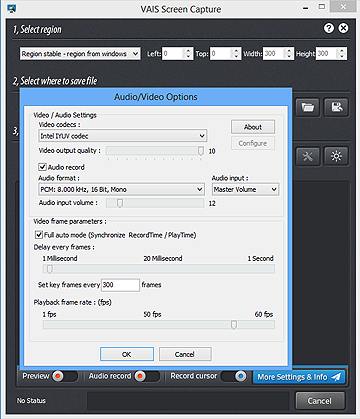
Before recording, you can click "Audio Video Options" to specify settings for video and audio recordings. There you can choose video codec or specify audio format, input and volume. Or for professional uses, the video frame parameters are adjustable.
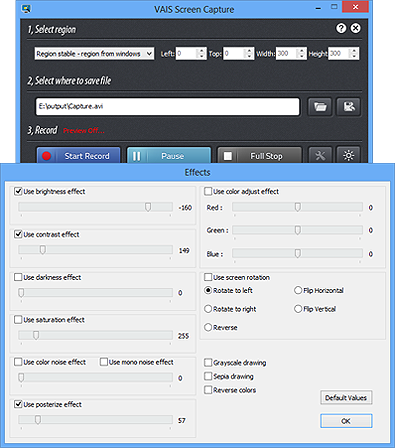
If needed, you can apply effects like brightness, contrast, darkness, saturation, etc. by clicking "Filter Effects" to make your recordings attractive. Furthermore, you can rotate screen and if you are not proficient at these settings, use default values.
There are 4 buttons at the bottom, you can change their status: Switch on "Preview" to preview the recording; activate "Audio record" to record audio synchronously; if you need to record cursor activities, click "Record cursor"; Click "More Settings & Info" to add overlay, set recording duration, specify recording region appearance, etc.
4. Start Recording
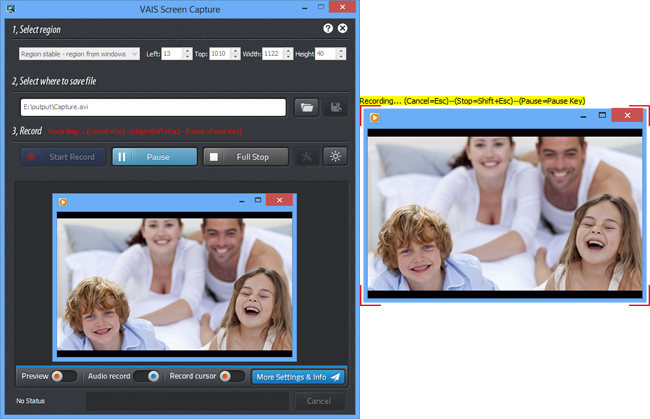
When all the settings are settled, you can simply start recording when clicking "Start Record". If you choose "region from windows" to record at the beginning, you need to move the cursor to the area you want to record and once it is settled, press "Ctrl + Enter" to start recording. If you need to stop for a while, click "Pause" and when the recording is finished, press "Esc" or click "Full Stop" to quit recording.
