How to Resize Images in Batch:
Sometimes, pictures are too big for a web page or to send via email and you will need to resize them to fit the proper dimensions. Resizing the picture to its final dimensions can also significantly decrease the amount of time it takes to download, since the file size will be smaller. Worked as an image resizer, VAIS Image Converter can also help resize the images in pixels, percentage or based on one side.
1. Input Image
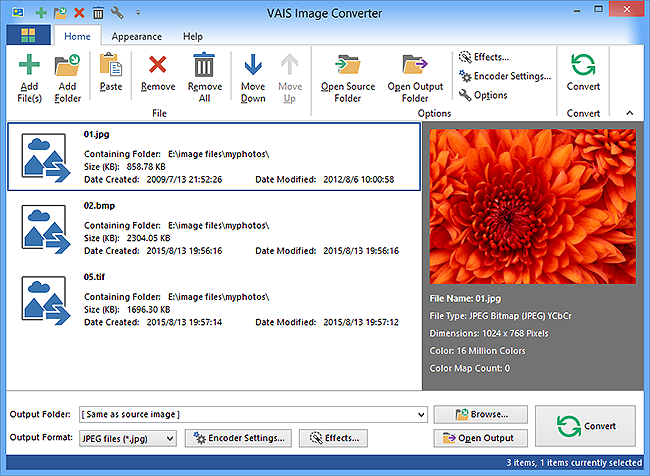
First, you need to download, install and launch VAIS
Image Converter and then click "Add File(s)" or "Add Folder"
to open file picker window in which you can choose the image
file or folder containing image file. After that, click
"Open" to add them into the file list. "Drag & Drop"
and "Copy & Paste" are supported for inputting image
files conveniently.
The detailed information of each image will be listed clearly
like filename, location, size, date created and date modified.
When clicking one of the images, you can preview it in the
window on right side with info including file type, dimensions
and color mode.
If you want to remove a certain file, click "Remove" to
delete the selected file from the list. To delete all images,
click "Remove All". The conversion sequence can be arranged
if you choose "Move Down" or "Move Up" for the selected
images.

2. Adjust Resizing Settings
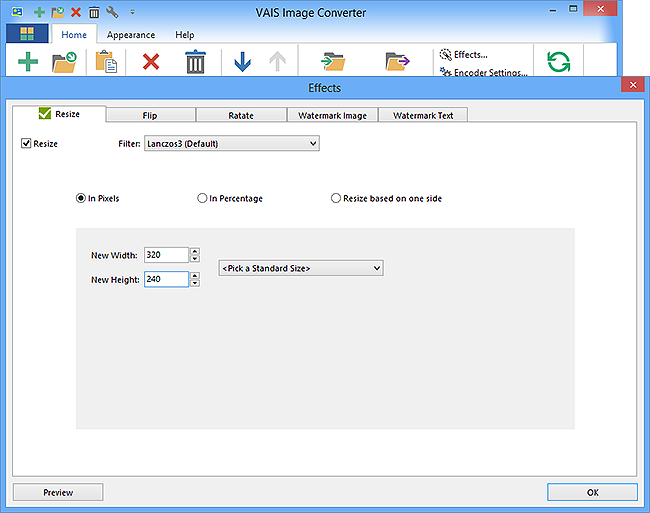
Click "Effects" and in "Resize" tab, check "Resize" to
activate resizing settings. In the dropdown menu of "Filter",
choose the resizing filters for the image. After that, choose
one way to resize your image: Resize in Pixels, Resize in
Percentage and Resize based on one side. To adjust the size
of output image, you can input the number of "New Width"
and "New Height" or choose the standard size from the dropdown
menu.
If you want to make more adjustments to the image, other
options like flip, rotation and watermark & text insertion
are available to specify.

3. Specify Conversion Settings
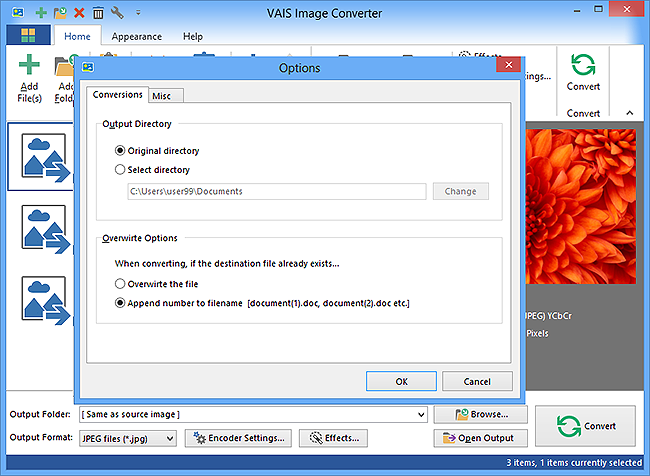
Click "Options" and in "Conversion" tab, you can specify
output directory. If you want the output files saved in
the same folder as source files, check "Original directory".
Or check "Select directory" and click "Change" to specify
an output folder as you need. When the destination file
already exists, choose one of the overwrite options: Overwrite
the file or Append number to filename. To prompt confirmation
message box and play reminder sound, select "Misc" tab.
After that, you can choose the image format in the dropdown
menu of "Output Format". Click "Encoder Settings" and there
you can make adjustments for image compression, quality,
color, etc.

4. Start Conversion
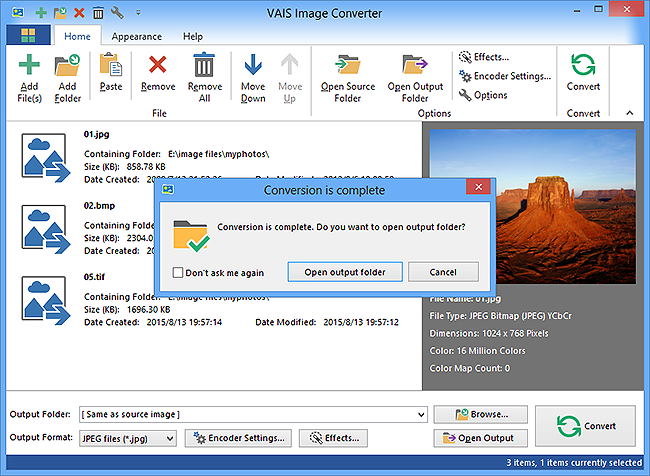
When all the settings are settled, you can simply start resizing by clicking "Convert". You will always be informed with the converting process as a process bar shows. Once the resizing is complete, you can find the resized images directly by clicking "Open output folder".

