How to Burn Data Disc (Data CD & Data DVD):
VAIS Disc Burner can create high-quality data CDs or DVDs to transfer or backup your important files and folders such as financial data, favorite album, graduation photos, etc. easily. For convenient sharing, it has the ability to create abundant data discs including CD-R, CD-RW, DVD-R, DVD-RW, DVD+R DL, Blu-ray, Double Layer discs, rewritable and extra-large capacity Blu-ray media, etc. When the boot sector has become corrupted or damaged, VAIS Disc Burner can create bootable CD/DVD to boot up the computer. From now on, you can burn all your important data to CD/DVD so you don't have to delete them for enough disk space.
1. Activate Data DVD/CD Burner
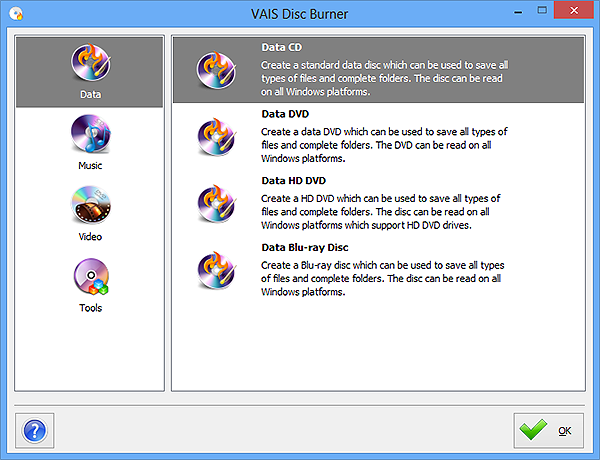
First, you need to insert a writable DVD/CD to your disc drive and then launch VAIS Disc Burner. After that, click "Data" and choose "Data CD"/"Data CD" to activate data DVD/CD burner.
2. Select Burning Device
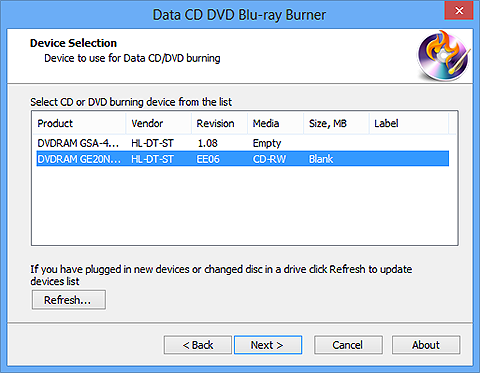
You system will be scanned and a list of devices connected will be displayed. Choose one of them as your burning device. When plug in new devices or change the disc in your drive, you need to click "Refresh" to update your device list.
3. Choose File System Type
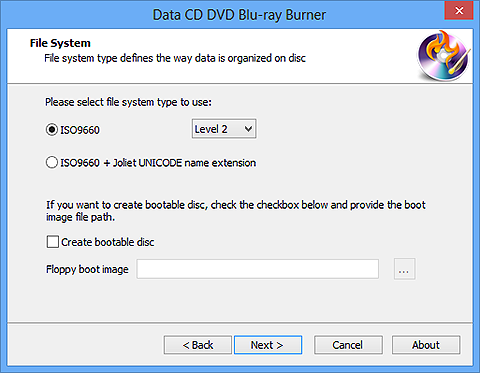
Click "Next" and you will find two file system types: ISO-9660 and ISO-9660 + Joliet UNICODE name extension, choose one of them to save the data. For those who want to create bootable disc, check "Create bootable disc" and choose the image files to create bootable disc.
4. Add Files or Folders for DVD/CD Burning
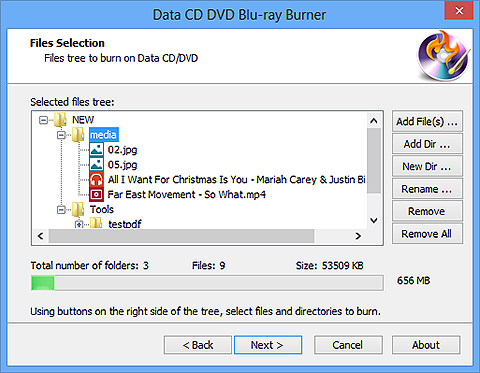
Click "Add File(s)..." or "Add Dir..." to input files or folders for your data DVD/CD burning. You can also create new folder by clicking "New Dir..." or to rename any folder, choose "Rename...". If you want to remove a certain file or folder, click "Remove" to delete the selected file or folder from the list. To delete all files and folders, click "Remove All".
5. Select Burning Mode & Speed and Start Burning
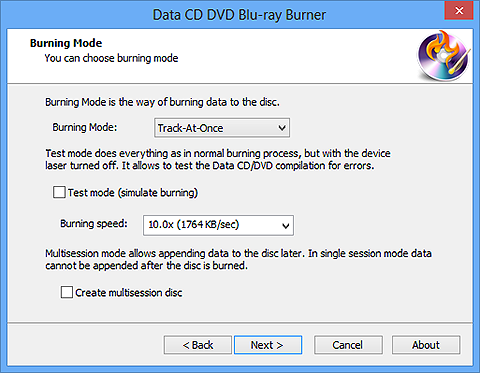
According to your needs, choose one burning mode from the dropdown menu of "Burning Mode" which includes Track-AT-Once, Session Track-AT-Once, Disc-AT-Once PQ and Disc-AT-Once raw P-W. You can use the Test mode to activate burning for checking errors. After that, you need to choose the burning speed appropriately. When all the settings are done, you can start DVD/CD burning by clicking "Next" and a progress bar will show you the status of burning. Once the burning is complete, the disc will eject automatically.
