How to Edit Audio Files:
VAIS Audio Editor can certainly be a great assistant for your daily audio editing work. It provides functions including recording, visual editing and CD burning to meet your needs. You can record sounds from various sources like stereo mix, online streaming, web radio and so on. When editing audio files, you can cut, copy and paste parts of recordings visually. At the same time, to edit more conveniently, you can also set bookmark and add region. Effects like echo, fade in and out, chorus and amplification can do you a great favor to get unique audio sound. What's more, the build-in CD ripper is available if you would like to burn your music creation to Audio CD. Besides, it has many other tools like noise reduction, speech synthesis, ID3 tag and WMA tag info editor, etc.
1. Input Audio
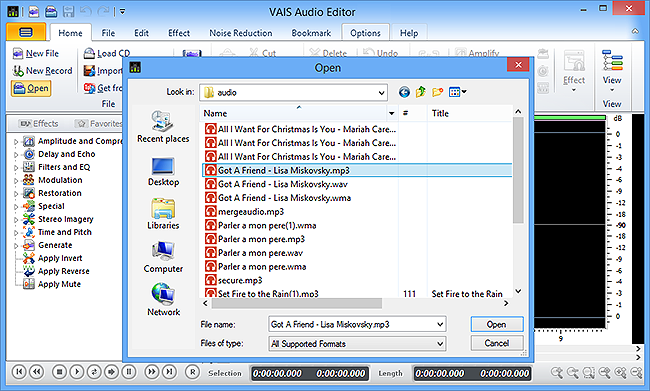
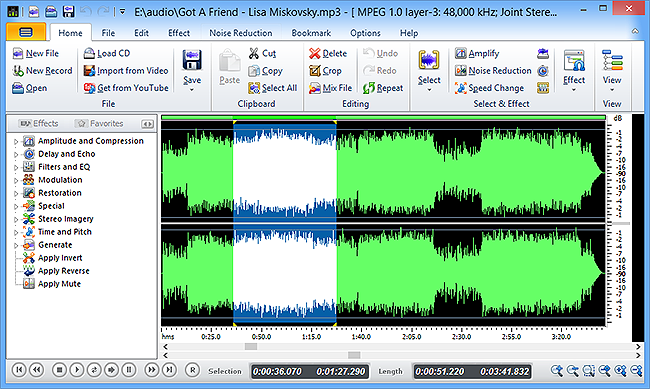
First, you need to download, install VAIS Audio Editor and launch it. After that, you should click "Open" and in the popped up window to select an audio file for editing. Once the audio file is input, you can see the waveform in the program window.

2. Choose a Region for Editing
To choose a region for editing conveniently, xxx provides multiple ways: Left click your mouse and drag it to select the part you want to edit; click "Select" and you can see 4 options including "Select to Start", "Select to End", "Select Specified Time" and "Select All"; At the bottom of the window, you can change the start/end time or duration for audio selection.

3. Edit Audio
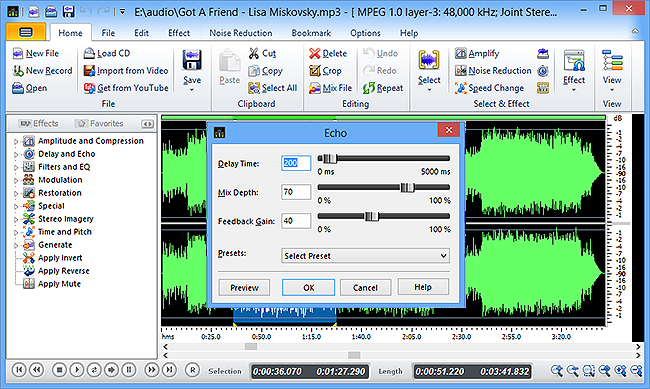
In "Edit" tab, you can perform basic editing like cut, copy, paste, crop and delete. Or you can apply multiple effects such as Echo, Vibrato, Amplify, Chorus, etc. To withdraw any incorrect option, click "Undo" or "Redo".

4. Save the Changes
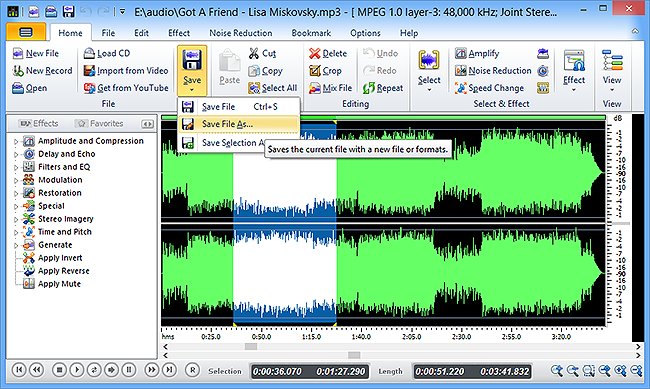
Once the editing is finished, you can save it by clicking "Home" or "File" tab to find the save button. Click it and you will be provided with 3 options: "Save File", "Save File As" and "Save Selection As".

